You've started a free trial of Chorus Connection, now what? Try these initial ten exercises to get familiarized with our chorus management software.
- Update your profile.
- Customize your statuses.
- Customize your sections.
- Create and activate your first concert cycle.
- Add your first calendar event.
- Create your first attendance roster.
- Track your attendance.
- Add your first music files.
- Add your first store item.
- Update the dashboard.
- BONUS: Invite test users into your free trial account.
1. Update Your Profile
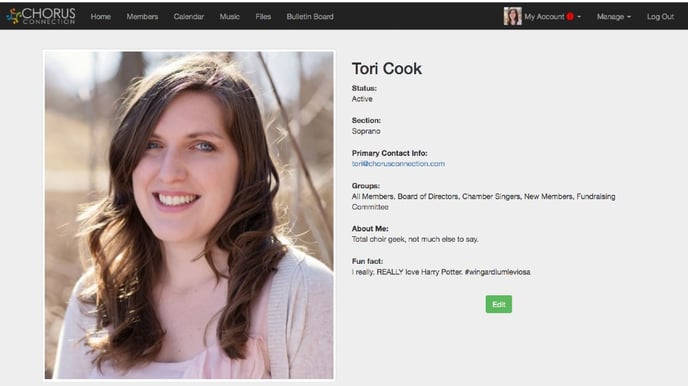
Every member in Chorus Connection can update their own profile that will appear in the member directory. Let’s set up yours!
- Go to My Account>My Profile.
- Click Edit and enter your profile details. Note that you can hide your email, phone, and address from the member directory so that only account administrators can see this information.
- To upload a profile picture, click Choose Image and select your image file. If uploading
from your phone, activate your camera for a selfie! - Click Save.
- Go to Members in the main menu to see your profile in the member directory!
2. Customize Your Statuses
.jpg?width=688&name=Statuses%20in%20Chorus%20Connection%20(1).jpg)
Statuses help differentiate between your active and inactive users in Chorus Connection. You can create as many active or inactive statuses as you like to help you keep track of your membership.
- Go to Manage>Statuses.
- Click New to add a new status or click the green Edit button next to an existing status to change it.
- Add or edit the name of your status and the email address for your status.
- From the drop-down, choose who should be allowed to email the group. More details about these options can be found in this article.
- Click Save.
- Back on the Manage>Statuses page, click the blue Details button next to a section to see members who are assigned to it. This will update automatically as you change a member's status on their profile or add/archive members!
Did you know? In addition to the ability to email Statuses, Statuses can be utilized to further segment information within Chorus Connection. For example, you'll be able to segment your Calendar, Event RSVPs, and Files by Status so that only the right people are accessing certain information! Learn more about Statuses in this article.
3. Customize Your Sections

Sections in Chorus Connection are synonymous with voice parts, and, in some cases, such as with children's choirs or multi-ensemble organizations, are utilized to differentiate between ensembles as well. No matter what your ensemble or voice part structure is, our Sections can be customized to meet your needs. Let's try it out!
- Go to Manage>Sections.
- Click New to add a new section or click the green Edit button next to an existing section to change it.
- Add or edit the name of your section and the email address for your section. Note: In most cases, it is unnecessary to create divisi for your voice parts in this area. Upper/lower divisi splits are actually built-in as a field on the member profiles!
- From the drop-down, choose who should be allowed to email the group. More details about these options can be found in this article.
- Click Save.
- Back on the Manage>Sections page, click the blue Details button next to a section to see members who are assigned to it. This will update automatically as you change a member's section on their profile or add/archive members!
Did you know? In addition to the ability to email Sections, Sections can be utilized to further segment information within Chorus Connection. For example, you'll be able to segment your Calendar, Event RSVPs, Files, and Music by Section so that only the right people are accessing certain information! Learn more about Sections in this article.
4. Create and Activate Your First Concert Cycle
.jpg?width=688&name=Concerts%20in%20Chorus%20Connection%20(1).jpg)
In our chorus management software, Concerts represent things like concert periods, concert cycles, semesters, terms, etc. It's the logical grouping of time that organizes repertoire, rosters, rehearsal dates, and when members owe money for things like membership dues or tuition. Over time, you'll create many concerts — let's create your first one!
- Go to Manage>Concerts.
- Click New.
- Enter the name of your concert cycle and click Save.
- Back on the Manage>Concert, find the concert you have created and click the blue Make Active button next to it. Note: Only active concerts appear for your members!
- Tada! You now have an active concert cycle for which to associate your data.
5. Add Your First Calendar Event
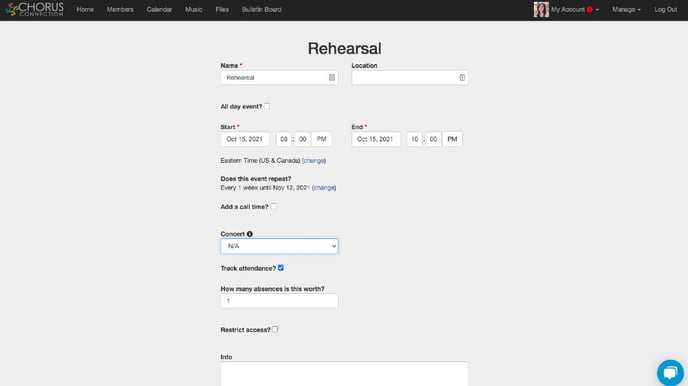
Now that you’ve got your concert cycle, let’s set up the calendar event - perhaps your first rehearsal! Later, you’ll even be able to enable and track RSVPs for your events as well.
- Go to Manage>Calendar.
- Click New Event.
- Enter the name, location, and dates/times. For this exercise, list the calendar date as today's date! Note: you can also include virtual meeting links in the location field.
- Don't forget to choose the Concert that your event is affiliated with!
- For this exercise, please also check the box next to Track attendance?.
- Enter the rest of the information about the event in the textbox and click Save.
6. Create Your First Attendance Roster
Now that you've created and activated your first concert cycle and assigned at least one calendar event to it, let's take a look at attendance. In Attendance, you'll be able to assign singers to a concert roster and track attendance.
- Go to Manage>Attendance.
- Click on the blue Attendance button next to your active concert.
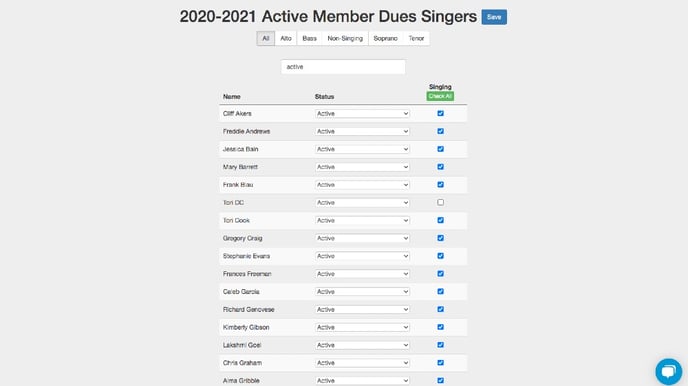
- Click the green Manage Singers button at the top.
- On the Manage Singers page, you'll typically see all of your users in Chorus Connection. Since you're probably the only user right now, you'll only see yourself. Go ahead and select the checkbox next to your name under the "Singing" column and click the blue Save button at the top. You've just added yourself to this attendance roster!
- You're then taken back to the Attendance summary screen where you'll be able to see a quick summary and count of the singers on your roster.
7. Track Your Attendance
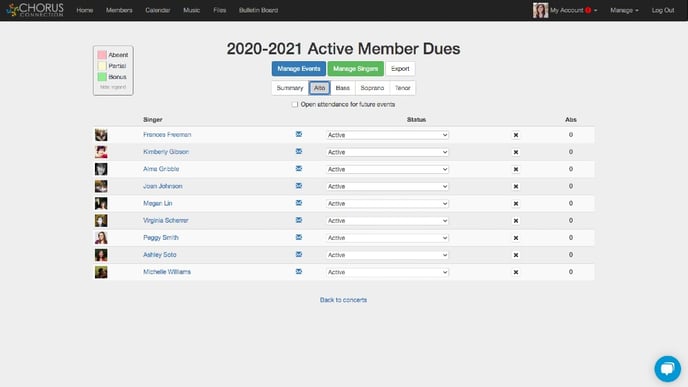
Taking attendance is easy and can be done on any smart device! Today, since you're the only user in your Chorus Connection account, I'll show you how to take your own attendance.
- Back in your concert's attendance summary, you'll now see one singer in your roster.
- Navigate to the section (or voice part) tab at the top to take your attendance. (Be sure to click on the section that corresponds with your own member profile.)
- Since you've added a calendar event for tonight, you should see that event date appear in your attendance sheet. Next to your name you should see a red box with the number "0." To mark yourself "in attendance" click on that red box!
8. Add Your First Music Files
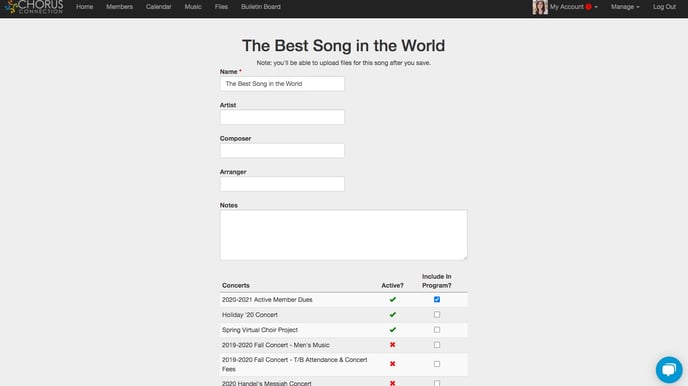
If your chorus has music files — such as listening tracks or online sheet music — you can store them all inside of Chorus Connection’s Music. This is great for PDFs, mp3s, and more!
- Go to Manage>Music.
- Click New.
- Fill out the details of your song.
- Click the Include In Program checkbox next to your concert cycle from step four.
- Click Save.
- Back in Manage>Music, find the song you just created and click the blue Upload Files button next to it. Select the files you would like to upload from your device.
- To see how this will appear for your singers, go to Music in the main menu and click the blue Music next to your active concert name. Expand the carrot on your song title to see all of your uploaded files!
9. Add Your First Store Item
Collecting member payments in Chorus Connection is easy to set up and there's so much you could do with Payments! Let's start with something easy and set up a simple store item for your music fees for your active concert.
- Go to Manage>Payments.
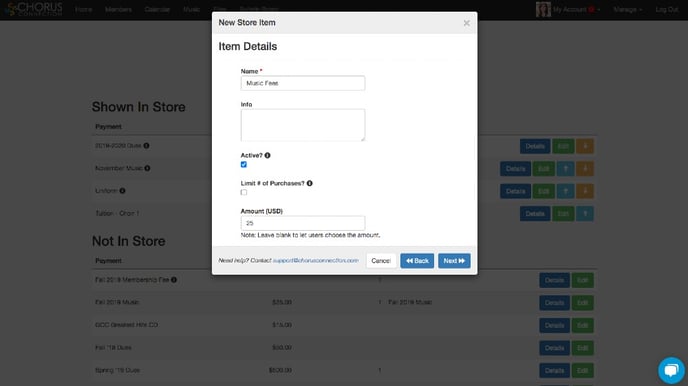
- Click Store then click New.
- In the pop-up widget, click Simple.
- Enter a name for your store item, click the checkbox next to Active? to make it visible in the store, set an amount, and click Next.
- Under Is this payment required?, select "Yes."
- Under Who should see this item in the Payments Center?, select "Only people required to pay for it."
- In the list of concerts below, find your active concert that you created in step 4. Check the box next to it under the Required? column.
- Click Next.
- Click Finish.
- You've just created your first online store item! To see what your users will see, navigate to My Account>Payments Center. Because you are assigned to the concert from step 4 and because you've just made the store item required for anyone singing that concert, you should see this store item appear in your own personal Payments Center.
Note: The payments feature offers robust functionality that may not be fully visible to you in your free trial account. To learn more about payments, we recommend scheduling a live demo with our sales team.
10. Update the Dashboard
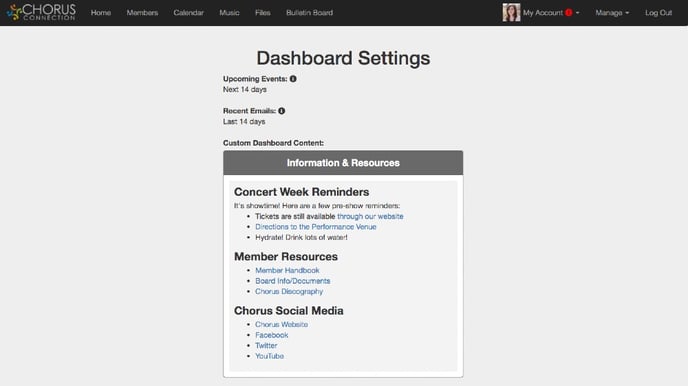
The dashboard is the first thing your users will see when they login to Chorus Connection. Keep your dashboard up-to-date with the most urgent things your chorus needs to know. Give it a go!
- Go to Manage>Dashboard.
- Click Edit.
- Choose how many events and emails you want shown on the dashboard.
- Create an informative header like “Gotham City Chorale - Important Information.”
- In your textbox, add your important announcements. Play with the styling tools to make it look the way you want!
- Click Save.
- Go to the Dashboard in the main menu to see what your members will see.
BONUS: Invite Test Users into Your Free Trial Account
Do you have board members, staff, or volunteers that want to take Chorus Connection for a test drive? Great! You can invite an additional 9 users to join you in your free trial account. Here's how:
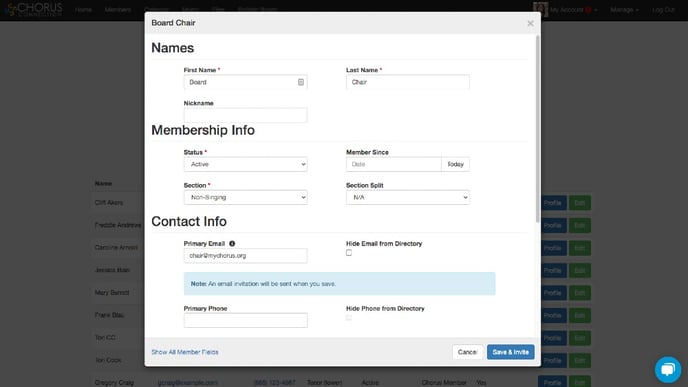
- Go to Manage>Members.
- Click New.
- Fill out all required fields and the Primary Email field.
- Click Save.
- Upon saving, Chorus Connection will send an email invitation to your user with instructions for logging in. You might want to let them know that you've just sent them an invite so it doesn't get lost in their inbox!
Learn More About Chorus Connection
These ten exercises only scratch the surface of what Chorus Connection can do for your choral organization! In addition to exploring your free trial account, we recommend perusing our demo videos and Help Center to learn more about our chorus management software.
If you have additional questions, please contact us at sales@chorusconnection.com or schedule a live demo with our team.